 how-to
How to Regrade a Yard to Prevent Standing Water
Table of Contents
- How to Regrade a Yard to Prevent Standing Water: What You'll Need
- How to Find Low Spots in a Yard
- Yard Grading Slope Away From House: The Measurements That Matter
- Best Soil for Yard Grading (and How to Compact It)
- Step-by-Step: How to Regrade a Yard
- Cost to Regrade a Yard: DIY vs. Professional
- Aftercare and Seasonal Verification
- Frequently Asked Questions
Last Updated: October 16, 2026
How to Regrade a Yard to Prevent Standing Water: What You'll Need
Standing water is usually a grading problem, not a soil problem. When we regrade a yard, we reshape the surface so water flows away from the house instead of pooling. This guide from OCAS Residential covers the full process, from diagnosis to aftercare.
Yard grading is shaping soil so surface water drains toward a planned low point instead of collecting near a structure. Get the slope right and most pooling disappears without a drain.
Here's what you'll need before you start:
- Shovel, garden rake, and a landscape rake
- Wheelbarrow or garden cart
- Topsoil and fill soil
- Hand tamper or plate compactor
- String line, stakes, and a line level
- Straight 2x4 board (at least 8 feet)
Tools and Materials for Regrading
A line level and string measure slope without guessing, and a plate compactor settles fill soil so it doesn't sink later. You need two soils: fill soil to build up low areas, and topsoil on last to support grass. Keep them separate.
Diagnose the Source of Water Before You Move Soil
Find where the water comes from before you touch a shovel. Pooling in one corner often traces back to a downspout, a neighbor's runoff, or a high spot blocking flow. Walk your yard after heavy rain and watch where water enters and stops, checking downspouts, buried outlets, and the slope near your foundation. If water arrives from a neighboring yard, grading alone won't fix it, you may need a French drain or catch basin.
How to Find Low Spots in a Yard
Finding low spots starts with a string line and a level. Stretch string between two stakes across a suspect area; the gap between string and ground shows where water will collect.
Here's how to map your yard's low points:
- Drive stakes at the high and low ends of each problem area
- Tie string between them and attach a line level
- Measure the distance from string to soil at several points
- Mark every spot where water would pool
- Note how water flows between those spots
Do this after rain, when the ground shows you the truth.
Assessing the Yard's Slope and Low Points
A yard can look flat and still hold water, dips of an inch or two trap runoff. Use your string measurements to map the highest point, the lowest point, and every dip between. That map tells you how much soil to add and where.
Yard Grading Slope Away From House: The Measurements That Matter
The yard grading slope away from house rule is simple: soil should drop at least 6 inches over the first 10 feet from the foundation, roughly a 5% grade. Flatter and water creeps back toward the structure; steeper accelerates erosion. Slope is rise over run:
- 6 inches ÷ 120 inches = 0.05 = 5% grade
- A 2% grade means 2.4 inches of drop over 10 feet
- A 10% grade means 12 inches of drop over 10 feet
Aim for 5% to 6% near the house. Beyond 10 feet, a gentler 2% slope keeps water moving without making the yard hard to use.
How to Set and Verify a Target Grade
What determines whether your regrade works is translating that percentage into a physical target you can build to and check. Here is a measurement-led method using a string line, stakes, and a line level.
Step 1, Pick your two reference points. Choose a starting point at the foundation (the high end) and an endpoint 10 feet out (the low end). Drive a stake at each.
Step 2, Set the string at the target fall. Tie string between the stakes and attach a line level. Adjust the string at the low-end stake until it sits exactly 6 inches below the string height at the foundation stake, your 5% target.
Step 3, Read the gap at intermediate points. Measure from the string to the soil at 2-foot intervals. The gap should grow steadily as you move away from the house. If it stays flat, reverses, or jumps, that spot needs fill or cutting.
Step 4, Convert gaps to grade. Use a straight 2x4 at least 8 feet long with a level on top: place the board on the ground, level it, and measure the gap at the low end. That gap divided by the board length gives you the local grade, a 1-inch gap over 8 feet is about 1%, a 5-inch gap about 5%.
Step 5, Check the whole perimeter. Repeat the string setup on all four sides of the foundation. A single flat or reversed section sends water back toward the wall, even if the other three sides are perfect.
Recommended Slope and Calculation Examples
Use these examples to sanity-check your numbers:
- 5% over 10 feet: 120 inches × 0.05 = 6 inches of fall
- 2% over 20 feet: 240 inches × 0.02 = 4.8 inches of fall
- 6% over 6 feet: 72 inches × 0.06 = 4.3 inches of fall
If your yard is 40 feet deep and you want a 2% grade from the 10-foot mark to the back fence, that's 30 feet of run: 360 inches × 0.02 = 7.2 inches of additional fall. Add the 6 inches near the house and your total drop is about 13.2 inches, telling you how much fill you need and whether the finished yard will still feel usable.
Slope Near the Foundation vs. Slope Across the Yard
Treat these as two separate jobs. The first 10 feet from the foundation is the critical zone, 5% to 6% here protects the structure. Beyond that, 2% keeps surface water moving toward a planned low point, swale, or drain. Holding 5% across a half-acre creates a steep, erosion-prone surface and unnecessary fill.
Best Soil for Yard Grading (and How to Compact It)
The best soil for yard grading is a mix of fill soil for bulk and topsoil for the surface. Pure clay holds water; pure sand erodes. A blended fill that drains well but packs tight is the practical choice. Compact in thin layers: spread 2 to 3 inches at a time and tamp each layer before adding more.
Skipping compaction is the most common DIY mistake. Loose fill settles unevenly, recreating low spots within months and undoing the whole job.
Step-by-Step: How to Regrade a Yard
Regrading a yard means reshaping the surface in stages: mark the grade, add fill in layers, compact, and finish with topsoil. Rushing any stage creates new low spots.
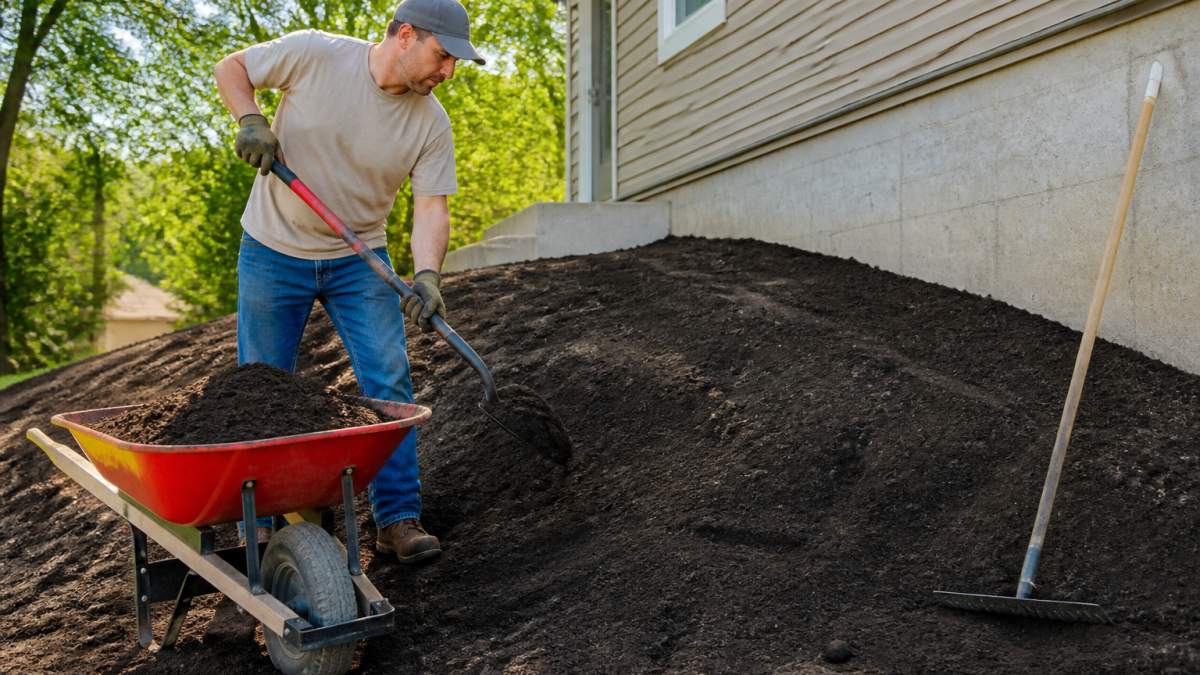
Follow these steps:
- Mark the target slope with stakes and string
- Remove grass and debris from the work area
- Add fill soil in 2 to 3 inch layers
- Compact each layer with a tamper or plate compactor
- Rake the surface smooth and check slope with your board
- Spread topsoil over the finished grade
- Water lightly and let the soil settle
Grading Around the House Foundation
Grading around the house foundation needs extra care. Keep the soil line below your siding or stucco, never bury the weep holes or the bottom of the wall, and build the slope so water leaves on every side. Walk the full perimeter with your level after grading, any flat or reversed section is a problem waiting for the next storm.
Common Mistakes to Avoid
- Adding soil against the foundation above the siding line
- Using one thick layer instead of thin compacted layers
- Ignoring where water enters the yard
- Grading toward a neighbor's property
- Skipping topsoil and leaving bare fill
Cost to Regrade a Yard: DIY vs. Professional
The cost to regrade a yard depends on square footage, soil volume, access, and whether drainage work is included. DIY saves labor but adds tool rental and soil delivery; professional grading adds labor but gets the slope right the first time.
What Actually Drives the Price
Four variables move the number more than anything else:
- Square footage and soil volume. A cubic yard of fill covers about 100 square feet at 3 inches deep, so a 1,000-square-foot regrade needs roughly 10 cubic yards before compaction. Compaction reduces volume by 15% to 25%, so order more than your math suggests.
- Access. If a truck can back up to the work area, delivery and removal are cheap. If soil must be wheelbarrowed through a gate or up a slope, labor hours climb fast.
- Existing conditions. Removing sod, roots, or an old patio adds labor and disposal fees. Hidden issues like a failed French drain or buried downspout line can double the scope.
- Drainage add-ons. A French drain, catch basin, or dry well is a separate line item. Budget them separately so you can see what the grade alone costs.
DIY Cost Factors
A DIY regrade is mostly material and rental costs:
- Fill and topsoil: sold by the cubic yard or in bags. Bulk delivery is far cheaper per yard beyond a small dip.
- Tool rental: a plate compactor and wheelbarrow are the two items most DIYers rent. A tamper is cheap enough to buy outright.
- Delivery fees: bulk soil deliveries often carry a flat fee, and some suppliers charge a fuel surcharge.
- Disposal: removing sod or old material may mean a landfill or green-waste fee.
DIY makes sense when the problem is one low corner, the slope is already close, and a truck can reach the work area.
Professional Cost Factors
A grading contractor prices labor, equipment, and materials together. Expect the quote to include machine time for excavation and rough grading, skilled labor for finish grading and compaction, bulk soil and topsoil, drainage work quoted separately, and permits if required.
Professional grading is the better call when water threatens the foundation, the yard is too large for hand work, access is difficult, or the fix needs drainage in addition to reshaping the surface.
DIY vs. Professional: A Decision Framework
| Factor | DIY | Professional |
|---|---|---|
| Best for | Small dips, one corner, slope already close | Large yards, foundation issues, drainage add-ons |
| Time | Several weekends | One to two days |
| Risk | Uneven settling if compaction is skipped | Lower, with proper compaction and equipment |
| Drainage add-ons | Limited to surface shaping | French drains, catch basins, dry wells |
| Permits | Your responsibility | Often handled by the contractor |
| Equipment | Rental compactor, hand tools | Skid steer, plate compactor, laser level |
Use these thresholds to decide:
- Go DIY if the low spot is smaller than roughly 200 square feet, the foundation is not involved, and you can move soil by hand or with a small cart.
- Hire a pro if water pools within 10 feet of the foundation, if the yard slopes toward the house, if you need a French drain or catch basin, or if the regrade spans more than about a quarter acre.
- Get a drainage specialist if water arrives from a neighboring property, if the yard sits over a high water table, or if previous regrading attempts have failed.
Permits, Property Boundaries, and Neighbor Impacts
Check your property lines before you move soil. Grading that pushes water onto a neighboring yard can create a legal dispute, and many municipalities require a permit for changes that alter drainage. Confirm the rules with your local building department first.
If your plan changes how water leaves your property, talk to your neighbor first. In many states, drainage law distinguishes between water that flows naturally across a property line and water you deliberately redirect, concentrating runoff onto a neighbor's lot can create liability even when the grade is correct. A short conversation before the first shovel is cheaper than a dispute after the first storm.
The fix for standing water is almost always slope plus compaction. Add a drain only after the grade is correct.
Aftercare and Seasonal Verification
Aftercare keeps your new grade working. Water the fresh topsoil lightly, keep foot traffic off for a few days, and recheck the slope after the first heavy rain.
Watch for these signs over the first season:
- New low spots forming
- Soil pulling away from the foundation
- Water still pooling after storms
- Erosion channels on steeper slopes
Reseed bare areas quickly. Grass roots hold the grade in place and slow erosion.
Recheck your slope every spring. Settling and root growth shift soil over time, and a quick string-line check catches small problems before they become big ones.
Frequently Asked Questions
How do you regrade a yard to stop standing water?
Start by diagnosing where the water comes from, then mark low spots with stakes and string. Remove the top layer of grass, add fill soil in thin lifts, and compact each layer. Build a slope of at least 6 inches over the first 10 feet away from the foundation so surface water and runoff flow toward a safe discharge point instead of pooling. Finish by reseeding or laying sod and checking the grade after the first heavy rain.
What slope should a yard have to drain properly?
Aim for a minimum 2% slope, which is about 6 inches of drop over 10 feet, moving away from the house. A 2% to 5% grade keeps surface water moving without causing erosion. Anything flatter than 2% lets water sit, and anything steeper than about 10% speeds up runoff and washes out soil. Measure the drop with a string level or a laser level before you start moving dirt.
Can you regrade a yard yourself?
Yes, small to medium jobs are realistic for a homeowner with a shovel, rake, wheelbarrow, tamper, and a string level. Plan on a few weekends for a section of lawn. Hire a professional when the yard is large, the slope is steep, the foundation is involved, or you need heavy equipment like a skid steer. A pro also handles permits, property line questions, and soil compaction that a hand tamper cannot match.
What soil is best for regrading a yard?
Use a sandy loam topsoil blended with a small amount of clay for structure. Avoid pure sand, which drains too fast, and heavy clay, which holds water and cracks. Never backfill against the foundation with the soil you dug out of the low spot if it is compacted or full of debris. Screen the fill, add it in 2 to 3 inch lifts, and compact each lift so it does not settle later and recreate the low spot.
Standing water doesn't fix itself, and guessing at slope usually makes it worse. At OCAS Residential, we handle land leveling, precision grading, and drainage solutions built for residential properties. We also install, repair, and replace custom fences and gates, so you can coordinate grading and fencing in one project. Schedule a free estimate with OCAS Residential and get your yard draining the way it should.